Welcome!

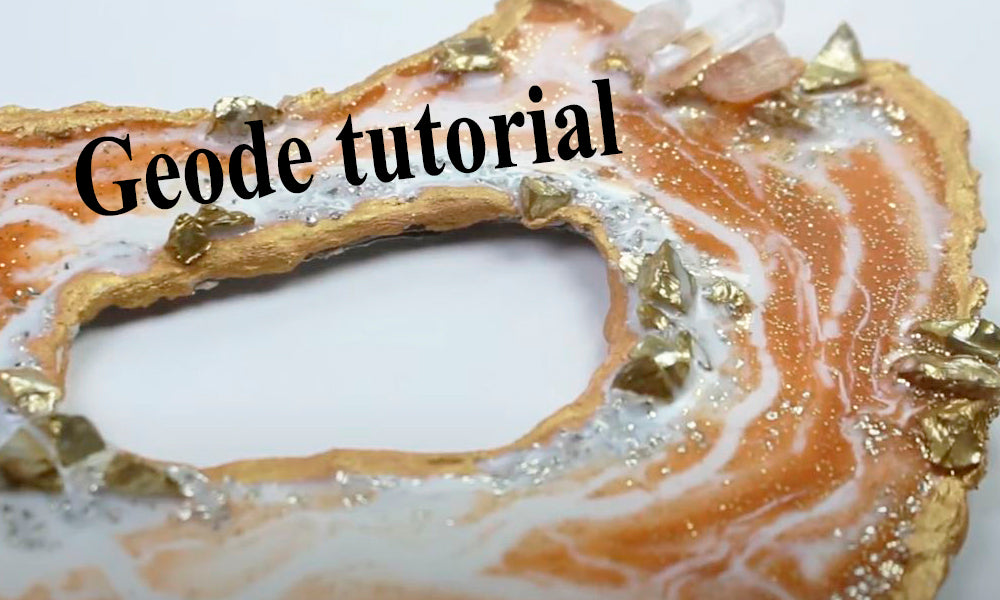
This is how to make a gold geode resin art with epoxy resin.
In this tutorial, I’ll walk you through the steps to make your own stunning geode design.
Gold geode resin art is easier to make than you might think. This tutorial will guide you through each step to create your own beautiful geode-inspired piece.

I’ll explain everything you need to know, from preparing your supplies to adding the finishing touches.
Plus, there’s a video at the end of this post that shows the entire process step by step, so you can follow along as you create your masterpiece. Let’s dive in!
It’s beginner-friendly, so even if you’re new to resin, you’ll be able to follow along. Grab your supplies, and let’s get started!
Supplies Needed
Resin mixing cups and spatulas
Respirator & gloves for protection
Gather all of your supplies so that everything is ready to be used. Make sure you are using the proper safety equipment for using resin, like a resin mask and gloves.
You can see that there are many things that I used to make this geode below and I had everything ready to go.

I like to do my resin projects on a large table that is covered with either a plastic sheet or a large cardboard sheet from the dollar store.
Take the artist board and draw the shape of a geode. I used a pencil for this and just drew it right onto the board.

Cut out the shape very carefully using the exacto knife. The artist board can be tricky to cut so make sure you are being very careful.

With white gesso, cover the whole board. You will want it to be thin enough so that it dries quickly, but not too thick.

There's going to be lines that are drawn into the gesso so you will want to be able to see them.

With a craft stick, draw lines into the wet gesso and then let it completely dry before moving on to the next step.

Take your craft concrete and go over the outside and inside of the geode. Lay it down nice a thick so that when you pour the resin, it will stay inside these borders.

When the concrete is completely set up and dried, take your metallic gold paint and paint over the concrete.

While the paint is still wet, you can now go ahead and start to add the crystals and fireglass pieces. Or use whatever you have on hand to create the chunky part of the geode.

If you find that the pieces are not sticking properly, wait until the paint is dry and then apply them with a tiny bit of hot glue.
Now it's time to mix the resin. I'm using a respirator for this part. I always make sure my lungs are protected from glitter and epoxy resin.
Never use resin without the proper safety equipment.
Also, keep in mind that any project that we do with resin is for adults only.

So mix a large batch of the resin and then separate them into a few different smaller cups. Then you can mix your resin colors in to the small cups.

Start to pour the colored resin starting from the center and working your way out with different colors and layering. This is the fun part! There's so many different designs to play with.

I started with a pearl mica and then put on a layer of gold colored resin.

I mixed the colors together a bit with a craft stick and then went ahead and added some more pearl white on the outside edges.

After the resin colors were finished, then I added some chunky glitter here and there. At this point, it's looking fantastic.

When the glitter part was completed, some more geode lines were added with a white colored resin. This gives in more layering and interest.

Pop any bubbles that rise to the surface with your heat gun and let it completely cure in a place that is free of dust or hair.

This is how mine turned out. I love it!

Here's the video: How to make a gold geode resin art.
Thanks for reading our tutorial on how to make a gold geode resin art piece. Happy creating!
More resin resources
Silicone molds for resin crafts
Resin artist and crafters gift ideas
Comments will be approved before showing up.