Welcome!

It's happening, crafters! Another new and exciting trend has started to get you hopelessly addicted. We see artisans and crafty people all over the internet whispering these words.
What are Artist Trading Coins?
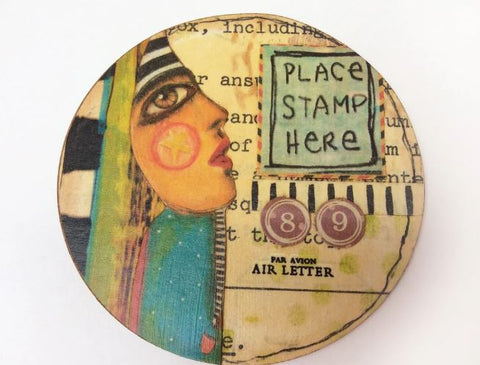
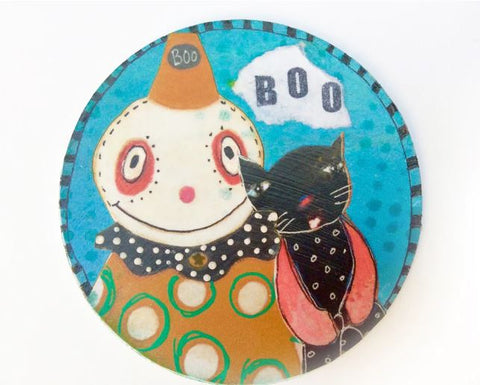
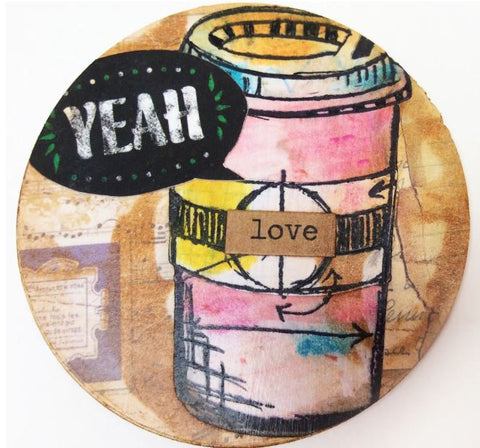
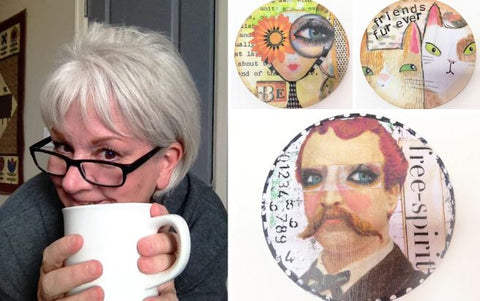
Artist Trading Coins are miniature pieces of art that are created on a 2.5-inch circle of heavy cardstock. They are created by and for artists to trade and collect. Artist Trading Coins were founded by Joanne from CraftyHodges in 2018.
How did the idea of Artist Trading Coins come to life?
I came up with the idea when I was in the shower one morning thinking about my YouTube subscribers and what I could come up with that would be different and fun for them to make.
I had recently been thinking about Bitcoins (cryptocurrency) and somehow the ideas melded together! My first thought was to call them Crafty Coins, but then I realized they were similar to Artist Trading Cards (ATC), just a different format.
I thought they would be fun to trade and share in happy mail, pocket letters, etc. I made a couple of samples and I was hooked. I kept the 2.5” size to be consistent with ATCs.
If you've read Elizabeth Gilbert's book "Big Magic" you know about the concept of ideas that are free floating and move from one person to the next until someone acts upon them? Well, that's exactly what I did!

What are the official rules when it comes to Artist Trading Coins?
Just like Artist Trading Cards, there are very few rules. They must be 2.5 inches in size and they are to be traded, never sold. The coins are generally made from heavyweight cardstock or watercolor paper. You want them to feel solid. Anything goes when it comes to creating the artwork.
Walk our readers through the process of making an Artist Trading Coin.
Make The Coin
Punch three circles out of 65# cardstock. Most punches are rated up to 65# cardstock, so using this weight of cardstock will ensure your punch is not damaged. Using a small amount of wet glue, adhere the circles together and let dry. The coins will become stronger as they dry.
Reference Frame
Punch a 2.5” circle out of an index card. This will become your reference frame to help with the placement of images.
Prepare The Image
It’s much easier to work in a square format (vs a circle) as you’re building your coin’s image. Cut a 3” square of background paper. Determine the rough placement of your focal image using the reference frame. Add any background stenciling, washi, rub-ons or stamping to your coin background. Continue to use your reference frame as you add more detail.
Glue The Image
Once satisfied with your background, glue the focal image(s) down using a generous amount of glue stick. Burnish your images down to ensure good adhesion. Using a permanent pen or marker, add any doodling or marks you wish to apply. Enhance your images with a colored pencil if desired.
Finish Up The Coin
If desired, sand the surface lightly to help blend the various layers. Apply a light coat of matte medium and let dry. Frame your design in the 2.5” punch and move around until you’re happy with the placement – punch out the coin.
Apply a generous amount of glue stick to both the paper coin and the cardstock coin. Burnish well. Use an emery board to “harden” the edge of the coin to ensure good contact along the edit. Hold the emery board or sanding block at a 45-degree angle and pull gently downward all around the edge of the coin.
Using a clear/neutral wax shoe polish, apply a thin coat and allow it dry for about 5 minutes. For an aged look, use brown shoe polish. Then, buff, buff, buff. The wax gives a smooth, protected finish and adds some depth of color. Apply distress stain around the edge of the coin to finish it off. As the final step, sign and date your coin on the back.
Tell us about your YouTube Channel
I made my very first video 4 years ago to share a journal I had made for a friend, documenting his 7-day bike ride. The journal turned out great, the video – not so much! It took a while for me to find my rhythm making videos, which are really a craft all unto itself.
Making innovative and fun videos is part of my passion, along with teaching others the fun of crafting, but especially magazine journaling and collage. I don’t monetize my YouTube channel, I do it strictly for the love of making and sharing projects and filming videos.
How many hours a week do you spend crafting?
I am a very early riser. I’m usually up every morning at 2:30 a.m. I am in my studio by 3:30 a.m. and play there for about two hours until I have to get ready for work.
What is on your crafting table right now?
A new idea I’m trying to work out (shhh, top secret) and my “This from That” magazine journal.

What is your favorite crafting tool?
I do a lot of cutting for my collage work, so my CutterBee scissors are probably one of my favorite things. Also, Prismacolor pencils are something I use EVERY SINGLE DAY to enhance my college work.
What are you most likely doing at 6 am?
LOL, drying my hair and getting ready to leave for work.
Where’s your favorite place to find materials to use?
Magazines, coloring books, junk mail, old books, children’s books, catalogs, paper napkins, Pinterest, and Google images. Keep your eyes open, there is inspiration everywhere!
Thank you so much, Joanne, for taking the time to speak to DIY Craft Club! I hope you all try to make some Artist Trading Coins! We have a ton of printable paper that you can use to help get you started.

Hi Kerri,
You might want to mount it onto artist board to make it more stable and then decorate. Good luck with your project. :)

I have a diy arts & crafts type of question. I would love any feedback. Don’t really know where else to ask.I have a 2’ 1/2”banner make of brown paper. I want to display on wall. How to make it look good. Plus it’s only paper so I need to make it more durable thanks
Bridget! That is so cool! Thanks for sharing that, will have to check that out!

I went to an art opening in Richmond Va in 2009 and the artist used circle shaped cards like ACTs but a circular version he created based on his art for the show. I traded one of his circles at atcsforall.com in 2010 with another member at our yearly gathering. She viewed it as a new approach to acts.
Hi Melody! This does sound like fun, doesn’t it! Be sure to tag us on Insta if you do! @hellodiycraftclub

Sounds like fun! Going to try this out for sure. Thanks for sharing the interview.
Comments will be approved before showing up.
Join our community of 1M+ DIY'ers just like you and learn how to bring more fun into your life!


Dianne Mudford
April 18, 2023
I would really love to join your group of artistic people. I was always doing something creative as a child and it has continued to be like this up to the present time. I used to make greeting cards and sell them, I no longer do that, I also like painting on canvas. I also just love making atc cards and when I saw you were making circles i could not believe how beautiful they were. I would really love to join your group. I live in Sydney, Australia and we are into a beautiful summer at the moment.