Welcome!

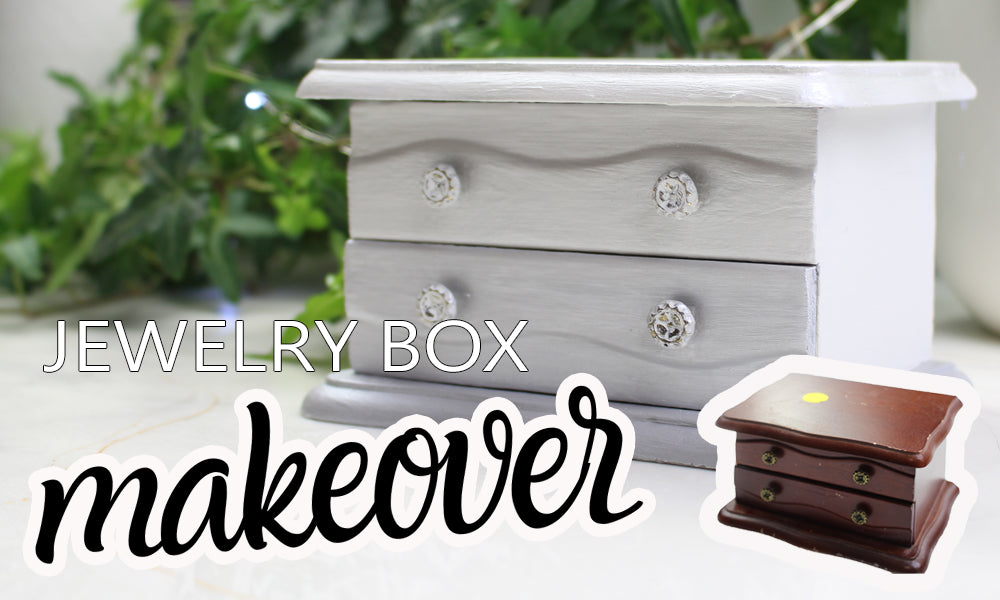
In this chalk painting tutorial we are going to upcycle an old jewelry box using Annie Sloan chalk paint and pearlescent glaze.
This is a step by step DIY tutorial using Old White, Paris Grey, and the Pearlescent Glaze.
Follow this easy chalk painting tutorial with video to give love back to old and forgotten objects at your local thrift stores or garage sales. We found an old jewelry box for only $3 and we are turning it into a beautiful new piece. The Pearlescent glaze just takes this old jewelry box to another level.
This is an official collaboration with Annie Sloan. They sent us some of the new Pearlescent Glaze to try and we were delighted how beautiful it looks! The pearl paint just gives the piece a whole new level of luxury. If you love to upcycle little pieces, then do try this tutorial because they make great home decor accents and great little gifts too.

This jewelry box had a few dings here and there but it's not in too bad of shape. Sometimes you can find amazing things at the thrift stores and we are always keeping our eyes open for things that we can turn into something fabulous with just a few coats of paint.
Pearlescent glaze was released by Annie Sloan in 2020. Pearlescent Glaze is a water-based paint that will give you a light-reflecting finish. You can use pearlescent paint for painted or unpainted indoor furniture. Once the Pearlescent glaze is completely dry, it will give the piece a high-end, pearly finish that catches the light beautifully.
HOW TO USE CHALK PAINT & PEARLESCENT GLAZE TO UPCYCLE A JEWELRY BOX
Step 1: First remove any stickers. One trick to get stickers off if you are finding them a bit stubborn, is to carefully use your heat gun to melt the glue a bit and then it will usually come off ok. We use the Zap heat gun found here on Amazon.
Step 2: Sand any deep marks and scratches a bit with 180 grit sandpaper. If you are going for an old super distressed look, you might not want to sand the marks too much, or at all.
Step 3: Clean the jewelry box really well with some soap & water and make sure it's dry before giving it another light sanding with a higher grit 220 sandpaper. Then wipe the jewelry box down one last time.
PS: When you are working on pieces like this you might want to wear an n95 mask because you just don't know what's on or in the finishes, there could be lead paint or varnish or something else that you don't want in your lungs. The best masks to use for crafts is this one from Parcil Distribution. Check Prices Here

Step 4: Give the jewelry box three light coats of Old White chalk paint and let it dry for about 8 hours between coats. Or if you have a really good primer, you might only need 1 or two coats.
The trick to a beautiful finish is to use makeup brushes. For this step, you will want an ultra smooth finish. We use makeup brushes because they are super soft. Here is the set that we use on Amazon. If you have never used makeup brushes for applying chalk paint then you might like them a lot. They are super soft and you can feather out the paint really well so they are perfect for when you don't want any brush marks.


*If you don't have Annie Sloan chalk paint, you can use what you have on hand or you can check other chalk painting brands here on Amazon.
Step 5: Give the top of the jewelry box a coat of the Pearlescent glaze. This is going to reflect the light beautifully. You can use this glaze on it's own or you can also mix it right into any Annie Sloan chalk paint color and that will add a pearl finish to your piece. When the light hits the pearl color, it is truly gorgeous.
*If you don't have Annie Sloan pearlescent glaze, you can use any pearl paint that you have on hand or you can check other chalk painting brands here on Amazon.
Step 6: Next paint the bottom of the jewelry box with Paris Grey. So now you will have the lightest color on the top of the jewelry box and the darkest on the bottom so now you can determine how light you need to go with the next two colors for the ombre effect.
Step 7: Mix the Old White and Paris Grey to get the next lighter shade. This shade should be slightly lighter than the Paris Grey, and this will go onto the bottom drawer.
Step 8: Now mix a shade that's a bit lighter and that will go on the top drawer. Let this dry for about 3 hours.
Step 9: Go over the whole piece again in the Pearlescent glaze.

PS: If you are using the Pearlescent glaze, you won't need to add any wax.
Step 9: After the jewelry box is completely dry, just take some of this paint off off the knobs to distress them a bit.
Here is the final piece. It turned out so gorgeous.

MORE HELPFUL ARTICLES
Best Alcohol Marker Sets For Art
Here's a Pin for you to save to your chalk painting boards

Comments will be approved before showing up.