Welcome!
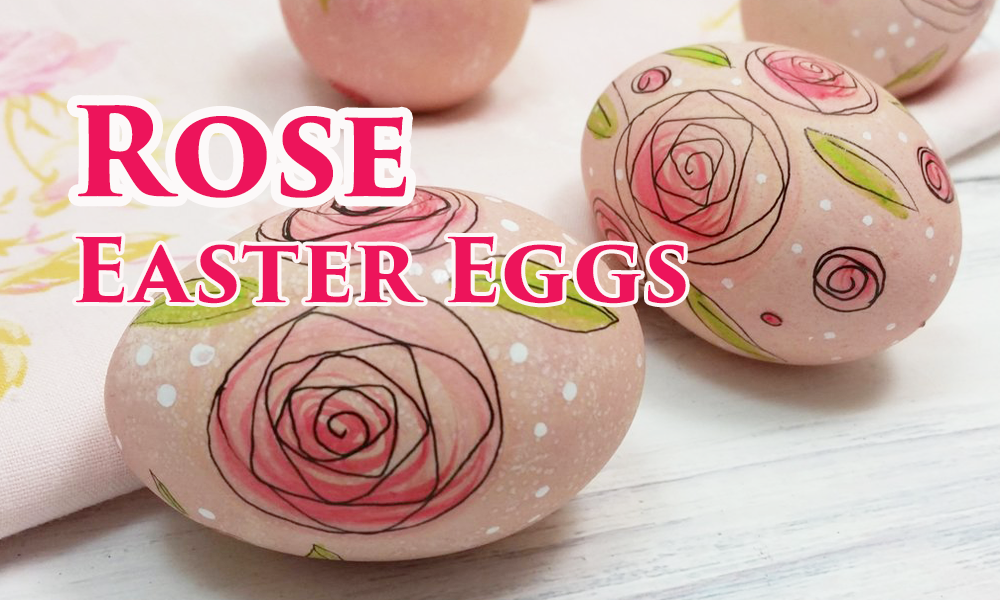
Here's an easy tutorial for Easter eggs with natural beet juice and hand drawn roses.
It's Easter Egg decorating time! So many years of fond memories come to mind when it's time to decorate and color Easter eggs.
Coming up with fresh and pretty spring Easter Egg decorating ideas is always so much fun.
Here is a dyed Easter Egg decorating ideas for you to try using beet juice.
Easter eggs can be decorated easily with beet juice and hand-drawn rose accents.
This beet dyed Easter egg decorating tutorial is super easy and you most likely already have what you need on hand.

If you are wondering how to dye Easter eggs with beets, you will be happy to follow along with this DIY using natural beet juice.
It's time to make pretty Easter eggs with beets.
Video DIY tutorial for making these Easter eggs is at the bottom of this article

For those who would like to try your hand at drawing pretty roses on your Easter Eggs, this will be a tutorial you will absolutely love.
These Easter eggs with roses are perfect for a cottage chic or shabby Easter theme.
Plus, if you are trying to be more eco-friendly, this recipe is a natural, eco-friendly idea for painting your Easter eggs using beet juice. You will be amazed at how good these turn out.
Chop up 4 beets and put them into a saucepan with 5 cups of water. Bring to a boil, turn down to medium heat and let beets simmer for about 20 minutes.
With a fine mesh strainer, strain your beets (can add them to your salad for dinner later, yum) and add in 1.5 tbsp of white vinegar. Vinegar helps the beet dye bind to your egg. Let cool.
Place your hard boiled eggs in a container like a bread loaf pan, and cover them with the beet juice. Let eggs sit in the beet juice for 20-30 minutes to dye them. If you want your Easter eggs a lighter pink shade, remove them sooner. For darker eggs, let them sit long as desired, even up to overnight.

Dry off your beet-dyed Easter eggs, being careful not to rub the beet dye too much or it will come off the egg.

Get your markers ready to decorate the beet-dyed Easter eggs.

Start off with coloring a circle on your beet-dyed Easter egg with the lightest pink marker.
Then take the next marker shade and go over the same circle a bit adding more depth of color. Finally, with your darkest pink shade add even more color.


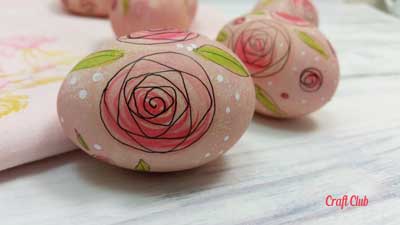
Take your black fine liner and make a circle. Keep this pattern going until your circle gets smaller and smaller. Now you have simple and whimsical roses!

Take a green marker and color some leaves on your beet-dyed Easter egg, and then go over them again with a black fine tip marker.


Lastly, take your Sharpie Paint Pen and paint on little white dot details. The Sharpie paint pen is perfect for this because the dots come out so smoothly, but you can use regular acrylic paint too with a toothpick.

Well, that's it! Keep on going until all of your beet-dyed Easter eggs are perfectly decorated with these pretty roses.
This beet-dyed Easter egg tutorial is right up there with some of our favorites because it's super fun to do and anyone can try this.


Watch how these pretty beet-dyed rose Easter eggs come to life in the video tutorial below.
Here are some frequently asked questions about hand painting Easter eggs
Start by boiling or emptying the eggs. If boiling, let them cool completely before painting. For blown eggs, rinse the inside with water and let them dry.
Acrylic or tempera paints work well for Easter eggs. They give you vibrant colors and paint on nicely to the eggshell. Make sure the paint is non-toxic and safe for decorative use.
Yes, you can use fine-tipped markers or pens designed for egg decorating. These will give you control for intricate designs and can be less messy than paint.
Allow each section of your design to dry before moving on to adjacent areas. This prevents smudging and helps maintain the sharpness of your details. Patience is key!
Comments will be approved before showing up.
Join our community of 1M+ DIY'ers just like you and learn how to bring more fun into your life!


