Welcome!

We are going to show you step by step how to paint an ombre wall. Painting an ombre wall is quite easy once you get the hang of blending the two paint colors together. This guide will show you exactly how to mix the paint colors to get a perfect ombre effect.
When it finally came time to paint my daughter's room we wanted to pick two colors that would go perfectly together to make an ombre. She has a love of pink and yellow, so I suggested we paint an ombre wall for her bedroom to look like a sunset!
She was totally down for that.
I let her choose from some soft pink and yellow colors that would ombre well together, and off we went!
Pink and yellow is a perfect combination for an ombre wall. Just keep in mind how well the 2 ombre colors will blend together when you are choosing your colors.
For example, green and red may be difficult to blend together using only 2 colors, since they are opposite colors on the color wheel and there are quite a lot of colors between them.
For an ombre wall, Try to go with 2 colors that are closely placed together on the color wheel. Here is a color wheel we grabbed from Sessions College that you can look at.

The ombre wall we painted using pink and yellow paint turned out amazing. The 2 paint colors blended together seamlessly.
Be sure to read this entire article before beginning your project to make sure you understand the steps that are coming up. This will help you as you go.
Here's a paint kit that comes in very handy for painting ombre walls. You get an 11 piece tray including almost everything you need. Plus if you have Amazon prime, you will have it with free 2-day delivery.

Check price of paint kit on Amazon here
Step 1: Safely remove anything on the wall that you don't want to paint over, such as wall covers. This is the point where you would want to fill any holes in the wall as well.
Step 2: Prep your surface. Use a primer first to achieve a smooth color, especially if you are painting over a dark color or an existing color in the yellow family, as they can show through.
Step 3: Decide where your colors will meet and draw a light line with pencil. Next, paint the trim in your colors. I chose my colors to meet at the halfway point of my wall, so I painted my ceiling trim and any areas around doors and closets near the top in my yellow and did the same around the bottom for the pink.

Step 4: Paint in your wall with the 2 paint colors. I painted the bottom half pink and the top half yellow. Let these two colors dry overnight before continuing.
Use saran wrap around your roller and paint to keep it wet until you continue.

Here is a visual guide to show you how to ombre your two paint colors so that they blend perfectly. For this the yellow will be color 1 and the pink will be color 2.
Step 1: In a container mix together color 1 and color 2. We will call this color 3. Use your eye to determine if you need more of one color to create the perfect blend.

Step 2: Paint a thick stripe of this newly blended color (color 3) with your roller, right along the line of where color 1 and color 2 meet.


Step 3: Split the paint you just made, color 3, into two more containers. Label them color 4 and color 5.
*In container 4, you will add more of color 1, slightly changing the color (color 4)
*In container 5 you will more of color 2, slightly changing the color (color 5)

Step 4: Paint a stripe of color 4 over the line where color 2 and color 1 meet.

Step 5: Using your sponge brush, blend the top of color 4 and the bottom of color 4. Use light, feathery strokes and just use your eye here.
Step 6: Paint a stripe of color 5 over the line where color 2 and color 3 meet.
Again, use your sponge brush to blend the lines on top and bottom of color 5. Use light, feathery brush strokes.

When you are done, your colors should look something like this afterward, but a bit more blended after you use your sponge brush to blend them a bit more smoothly.

Here is how my daughter's bedroom ombre wall turned out. You can see the gradual ombre effect.

Well, we hope this gives you a great visual guide on how to paint an ombre wall with 2 colors of paint.
Be sure to bookmark this page or save a pin to your favorite Pinterest wall. We would appreciate that!

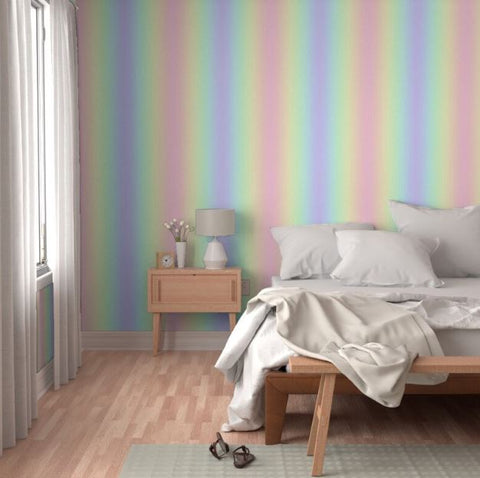
If painting your own ombre wall looks like it's a bit much for you to do, then check out the ombre wallpaper from Spoonflower.
Have a colorful day!
MORE HELPFUL ARTICLES
Where To Buy Succulents Online
How To Update Your Kitchen On A Budget

Is it important that color 3 be wet still when doing steps 4-6? Will it still blend if color 3 is dry?

Hi Stephanie, thanks so much!
The colors were Crocus Tint from Cloverdale Paint, and the soft pink color was Go Go Pink from Cloverdale Paint.

This is beautiful! What colors did you start with for the yellow and pink?
Comments will be approved before showing up.


DIY Craft Club Admin
June 22, 2021
Hi there Samantha, you can continue if color 3 is dry, you will be using a different technique called dry brushing in this case. With this in mind, you will want to keep your paint brush drier than normal, so pick up your blending color, and wipe off as much excess as you can. Think of soft, wispy strokes back and fourth, and patience will be your key here. You can let the paint dry on the wall, and if you don’t like the blending, dry brush it again. It may not look as blended when you are up close, so step back and have a good look at your blending work. Good luck!